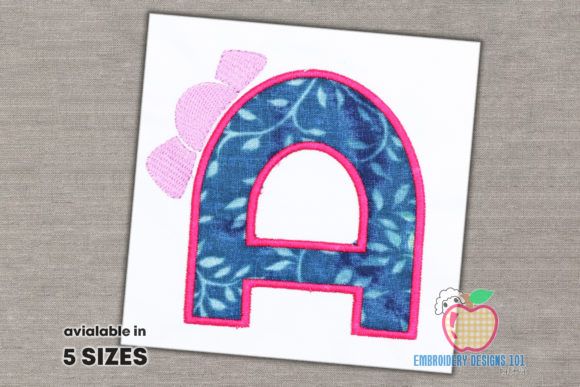
Letter a with Bow Applique: A Complete Guide to This Versatile Machine Embroidery Design
Machine embroidery has opened up a world of creative possibilities for sewists, hobbyists, and small business owners alike. Among the many designs available, the Letter a with Bow Applique stands out as a particularly charming and versatile option. Whether you are personalizing a child's garment, adding a decorative touch to a tote bag, or creating a set of personalized gifts, this design combines the timeless appeal of monogramming with the playful elegance of a bow. Understanding how to work with this design, from file formats to color change management, can make all the difference in achieving a polished, professional result.
This article explores the key qualities of the Letter a with Bow Applique design, how it functions across different machines, and practical considerations for incorporating it into your projects. Whether you are a seasoned embroiderer or just beginning to explore applique work, the following insights will help you get the most out of this delightful design.
Understanding the Design Structure and Appeal
At its core, the Letter A with Bow Applique design marries two beloved embroidery elements: a classic alphabet letter and a decorative bow. The letter itself serves as the foundation, often rendered in a clean, readable font that works well for applique. The bow, positioned either atop the letter, beside it, or integrated into the stem, adds a feminine, celebratory, or whimsical touch. This combination makes the design suitable for a wide range of applications, from birthday gifts to nursery decor.
One of the most important characteristics of this design is that it is structured with steps separated by color changes. This means each element of the design—the fabric base for the letter, the satin stitch border, the bow fabric, and any detailing—is assigned its own color stop. This structure is intentional and practical. It allows you to change threads and fabrics at precisely the right moment, ensuring that each layer is applied cleanly and securely. For the embroiderer, this translates into greater control over the final appearance.
File Formats and Machine Compatibility
A significant advantage of the Letter a with Bow Applique design is its availability in multiple embroidery file formats. This ensures compatibility with a broad range of machines, from single-needle home models to multi-needle commercial units. Common formats include DST, PES, EXP, JEF, VIP, and others. When you purchase or download this design, you typically receive a zip folder containing all these variations, so you can select the one that your particular machine reads.
This flexibility is crucial for modern workflows. If you own a Brother or Babylock machine, you will likely use the PES format. For Janome or Kenmore users, JEF is standard. Tajima machines typically rely on DST. By having all these formats available, the Letter a with Bow Applique design eliminates the need for format conversion software and the potential errors that can come with it. It also means that if you share designs with a fellow embroiderer who uses a different brand, you can simply pass along the appropriate file.
Before loading the design, always verify that your machine reads the specific format version. Some older machines may require a conversion, but most modern machines accept the standard formats without issue. It is also wise to check the hoop size required for your chosen design size. The Letter A with Bow Applique often comes in multiple size options, so you can select one that fits your project without excessive rescaling.
Managing Color Changes in Multi-Needle Machines
For those using a multi-needle machine, working with the Letter a with Bow Applique requires a specific approach. The design is built with color changes that act as natural breakpoints for fabric placement and thread switching. However, multi-needle machines are designed to automatically trim thread and move to the next needle when a color change is encountered. Because this design relies on the user to position fabric pieces at certain steps, you must override this automatic behavior.
The critical instruction here is to set your multi-needle machine to stop for color changes. Do not allow it to automatically proceed. By enabling the stop function, the machine will pause at each color change, giving you the opportunity to place the applique fabric for the letter, trim excess, add the bow fabric, and so on. If you let the machine run without stopping, it will attempt to sew the design in one continuous sequence, which defeats the purpose of the applique layers.
On most multi-needle machines, this setting is found in the machine's configuration menu or within the design editing software. Look for an option labeled "Stop for Color Change" or "Color Change Sequence." When this is active, the machine will halt and display a prompt for you to change thread or fabric. For single-needle machines, this is handled automatically because you must physically change the thread spool, but for multi-needle users, this extra step is essential for achieving the layered applique effect.
Practical Workflow for Applique Success
To get the best results with the Letter a with Bow Applique, follow a consistent workflow that respects the design's step-by-step structure. Begin by hooping your stabilizer and backing fabric firmly. The first color change typically stitches a placement line for the letter fabric. After this step, stop the machine and lay your chosen fabric for the letter over the stitched outline. The second color change often consists of a tackdown stitch that holds the fabric in place. Once that is complete, you can trim the excess fabric close to the tackdown line.
The next color change usually handles the satin stitch border for the letter. This is a dense, clean stitch that encases the raw edges of the fabric, giving the letter a finished, professional look. After the letter is complete, the bow applique begins. Again, a placement line appears, followed by a tackdown, trimming, and a satin stitch border. Some versions of the design include an additional color change for a center knot or decorative stitch on the bow, adding further detail.
Throughout this process, it is important to not color sort or combine colors in your software. The design is intentionally sequenced so that each step appears in a logical order. If you reorder or merge colors, you risk disrupting the applique sequence, which can lead to misaligned fabric pieces or skipped steps. Trust the original structure and follow it as the designer intended.
Choosing Fabrics and Threads for the Design
The choice of fabric for the applique greatly influences the final look of the Letter a with Bow Applique. For the letter itself, cotton quilting fabric is a reliable option because it is stable, easy to trim, and holds a crease well. If you want a softer drape, consider flannel or lightweight denim. For the bow, you might choose a contrasting fabric such as a delicate organza for a sheer effect, a satin for a dressy finish, or a patterned cotton for added visual interest.
Thread selection also matters. A polyester or rayon thread in a matching or complementary color for the satin stitch will make the design pop. Many embroiderers prefer a 40-weight thread for applique borders because it provides good coverage without being too bulky. For the tackdown stitches, a lightweight bobbin thread or a fine needle thread in a neutral color works well, as these stitches are typically covered by the satin stitch later.
Stabilizer choice depends on the fabric you are embroidering on. For stable woven fabrics, a tear-away stabilizer is sufficient. For knits or stretchy materials, a cut-away stabilizer provides the necessary support to prevent puckering. A fusible stabilizer can also be helpful if you want to secure the applique fabric before hooping, though many embroiderers prefer to rely on the tackdown stitch alone.
Project Ideas and Real-World Applications
The Letter a with Bow Applique design shines in personalization projects. For example, you could stitch the letter onto a baby onesie using a soft cotton for the letter and a satin bow for a sweet, girly touch. The same design on a canvas tote bag becomes a stylish accessory for a young girl or a teacher's gift. On a denim jacket, the applique adds a handmade, trendy element that stands out.
Small business owners can leverage this design to offer customized products quickly. Because the design comes in multiple file formats, it can be used on a single-needle machine for small orders or a multi-needle machine for larger batches. The key to scaling is consistency in fabric placement and thread tension. Once you master the workflow for the Letter a with Bow Applique, you can produce repeatable, high-quality results for clients.
For personal projects, consider using the design to create a set of monogrammed towels for a bathroom, a personalized backpack for a child starting school, or a decorative pillow for a bedroom. The bow adds a playful element that appeals to children and adults alike. Because the design is available for both uppercase and lowercase letters, you can spell out names or initials with a cohesive look.
Common Challenges and How to Overcome Them
Working with applique always presents a few challenges, and the Letter a with Bow Applique is no exception. One common issue is fabric shifting during the tackdown stitch. To prevent this, use a temporary spray adhesive or a dab of fabric glue stick to hold the fabric in place before the tackdown runs. Another challenge is achieving a clean satin stitch edge without gaps or puckers. Ensuring your tension is balanced and that you are using a sharp needle designed for embroidery will help.
For multi-needle users, forgetting to set the machine to stop for color changes is perhaps the most frequent mistake. If you find that the machine has run through multiple steps without pausing, you may need to reposition the hoop and manually restart the design from an earlier step, though this can be tricky. Developing a habit of checking the machine settings before each new project will save time and frustration.
Finally, trimming the applique fabric too close to the tackdown can sometimes lead to fraying or the satin stitch not covering the edge completely. Leave a small margin of about 1/8 inch beyond the tackdown line. This ensures that the satin stitch fully encases the raw edge, giving you a durable, neat finish.
Final Thoughts on Working with This Design
The Letter a with Bow Applique is more than just a decorative motif; it is a well-structured design that, when handled correctly, yields beautiful, lasting results. Its multiple file formats make it accessible to virtually any embroidery machine user, and its step-by-step color changes provide clear guidance for the applique process. By respecting the design's original sequencing and taking the time to set up your machine properly—especially if you use a multi-needle model—you can achieve consistent, professional-quality embroidery every time.
Whether you are creating a single gift or producing items for sale, this design offers a charming blend of simplicity and elegance. With careful fabric choices, proper stabilizer support, and attention to color change management, the Letter A with Bow Applique will become a reliable addition to your embroidery library. Explore different fabric combinations, experiment with thread colors, and enjoy the satisfaction of watching each layer come together to form a finished piece that is both personal and polished.