The Earth Made with Leaves Applique and Embroidery Design – A Complete Guide
Machine embroidery opens up a world of creative possibility, but few designs carry the layered meaning and visual richness of nature-inspired motifs. Among the most compelling offerings in this space are The Earth Made with the Leaves Applique and The Earth Made With The Leaves Embroidery Design. These two related designs let you stitch a stunning representation of our planet, built from the organic shapes and textures of leaves. Whether you are just starting your embroidery journey or you have years of experience running a multi-needle machine, understanding how these designs work, what file formats are included, and how to manage color changes will help you achieve professional, show-stopping results.
In this guide, we will explore the purpose and significance of these designs, break down the technical details you need to know, and offer practical advice for stitching them successfully. By the end, you will have a clear picture of how to bring the earth to life—leaf by leaf, stitch by stitch.
What Are The Earth Made with Leaves Applique and Embroidery Designs?
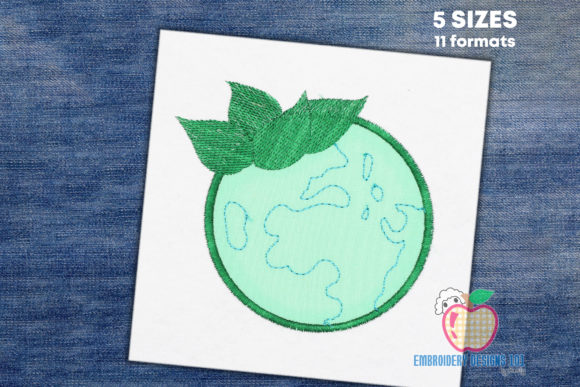
At their core, these two designs share a common theme: the Earth, rendered through the shapes of leaves. The applique version uses fabric pieces cut in leaf shapes, which are then stitched onto a base fabric to form the continents and oceans. The embroidery-only version achieves the same look entirely through stitching, using dense satin stitches, fill patterns, and outline work to create leaf forms that collectively map the globe.
Both designs come as a single machine embroidery file package that includes multiple file formats, so you can use them on virtually any embroidery machine—Brother, Janome, Bernina, Pfaff, Singer, Husqvarna Viking, and many others. The designs are built around the concept of color change steps. Each step represents a distinct thread color or applique piece, and the instructions are clear: do not color sort or combine colors. Let the machine stop at each change so you can swap threads or place fabric precisely.
The Applique Design: Layers of Fabric and Meaning
Applique is a technique where pieces of fabric are sewn onto a larger background to create a design. In The Earth Made with the Leaves Applique, each leaf is a separate piece of fabric—often in shades of green, blue, brown, or white—that you cut and position according to the design’s outlines. The machine first stitches a placement line, then a tack-down stitch after you place the fabric, and finally a decorative satin stitch around the edge. This process gives the finished piece a dimensional, tactile quality that pure embroidery cannot replicate. It also saves thread and time, especially for large solid areas like oceans or landmasses.
The Embroidery Design: Pure Stitch Artistry
For those who prefer not to work with fabric pieces, the embroidery-only version creates the same leaf-earth motif using thread alone. Dense fill stitches build up the leaf shapes, while intricate outline work defines veins, edges, and overlapping forms. This version is ideal for projects where you want a smooth, uniform surface—such as on shirts, caps, or bags—or when you are working with fabrics that do not take applique well, like performance wear or very lightweight materials.
Why This Design Matters: Purpose and Significance
Beyond its obvious aesthetic appeal, this design carries symbolic weight. The Earth made of leaves speaks to environmental awareness, the interconnectedness of nature, and the beauty of our planet seen through natural forms. It is a popular choice for:
- Eco-conscious brands and organizations – perfect for Earth Day events, sustainability campaigns, or nature-themed merchandise.
- Educational settings – classrooms and nature centers use it to spark conversations about geography, ecology, and conservation.
- Personal projects – embroiderers create wall art, tote bags, quilts, and clothing that reflect their love of the natural world.
- Fundraisers and gifts – a meaningful design for charity auctions, teacher appreciation, or environmental nonprofit merchandise.
The versatility of the motif—available in both applique and embroidery formats—means you can adapt it to nearly any project type or skill level.
Technical Details: File Formats, Color Changes, and Machine Setup
To get the best results, you need to understand the technical foundation of these designs. Let us walk through the most important aspects.
Multiple Embroidery File Formats Included
One of the strongest features of this design package is its wide file format compatibility. When you download the files, you will typically receive versions such as:
- .PES – Brother, Babylock, and many home machines
- .DST – Tajima and most commercial machines
- .EXP – Bernina and some Janome models
- .JEF – Janome
- .VP3 – Husqvarna Viking and Pfaff
- .CSD – Singer and some newer Brother machines
- .XXX – various multi-needle and industrial machines
Having all these formats in one package means you can open the design directly in your machine or embroidery software without needing to convert files. Always check your machine’s manual to confirm which format it prefers, but the included variety covers the vast majority of models on the market.
Steps Are Separated by Color Changes – Do Not Color Sort
A critical instruction for both designs is: steps are separated by color changes. Please do not color sort or combine colors. This means the design file has been digitized so that each color change corresponds to a logical stitching sequence—for example, the background leaves first, then the continents, then the outline details. If you use embroidery software to reorder or combine colors, you risk breaking that sequence. The machine might try to stitch a detail before the fabric underneath is in place, or it might stitch applique tack-downs in the wrong order.
Instead, leave the color sequence exactly as the digitizer intended. When the machine stops for a color change, you manually swap thread or place the next applique piece. This approach gives you the highest quality result and the least frustration.
Setting Multi-Needle Machines to Stop for Color Changes
If you are using a multi-needle machine (such as a Brother PR series, Janome MB series, or a commercial Tajima), you might be tempted to let it automatically switch threads between needles. However, the design instructions explicitly state: please set it to stop for color changes. Why? Because automatic needle changes assume the next color is already loaded in the next needle. But if you need to place an applique piece, trim excess fabric, or switch to a thread color you haven’t pre-loaded, the machine must pause. By setting the machine to “stop for color change” (often called “color change mode” or “manual mode”), you maintain full control.
How to do this varies by machine brand, but common steps include:
- Open the design in your machine’s memory or on the touchscreen.
- Navigate to the edit or settings menu.
- Look for an option like “color change method” or “thread change mode.”
- Select stop or manual instead of automatic.
- Save the setting and begin stitching.
When the machine stops, you will see a prompt to change thread or perform an action. This is your cue to place applique fabric, trim, or swap spools.
Practical Tips for Stitching The Earth Made with Leaves
Now that you understand the design and machine setup, here are some actionable tips to ensure a smooth stitching experience.
Fabric and Stabilizer Choices
- Background fabric: Choose a medium-weight woven or quilting cotton for best results. Avoid stretchy knits for the applique version, as they can distort the leaf shapes.
- Stabilizer: Use a tear-away or cut-away stabilizer depending on your fabric. For dense embroidery areas, a cut-away stabilizer provides long-term stability.
- Applique fabrics: Cotton, felt, or even organza work well for the leaves. Pre-wash fabrics to prevent shrinkage after stitching.
Needle and Thread Recommendations
- Needle: A standard embroidery needle (size 75/11 or 80/12) works for most fabrics. If your applique layers are thick, size 90/14 may be better.
- Thread: 40-weight polyester or rayon embroidery thread gives good coverage and sheen. Match thread colors to the leaf shades in the design or create your own palette.
Managing Color Changes Step by Step
- Load the design and set the machine to stop for color changes.
- Stitch the first color step (often a placement outline for applique).
- Place the first applique fabric piece within the stitched outline.
- The next color step tacks the fabric in place.
- Trim excess fabric close to the tack-down stitches.
- The following steps add satin stitching and additional leaf layers.
- Repeat for each color change until the design is complete.
Take your time. Rushing applique steps can lead to misaligned fabric or loose edges.
Common Misunderstandings and How to Avoid Them
Even experienced embroiderers sometimes stumble on color-change designs. Here are the most frequent misunderstandings, clarified.
- “I can combine all the green thread steps into one color.” Not advisable. The digitizer separated them for a reason—perhaps different stitch types or overlapping layers need distinct stops. Let the design run as made.
- “Multi-needle machines don’t need stops.” They do, for applique. Even for pure embroidery, some color changes involve trims or jump stitches that benefit from a pause. Set your machine to stop.
- “All file formats are the same.” They are not. Each format encodes stitch data differently. Using the wrong one can shift the design or cause errors. Use the file that matches your machine brand.
- “Applique is faster than embroidery, so I can skip trimming.” Proper trimming is essential for a clean edge. Skipping it leaves frayed fabric visible outside the satin border.
How This Design Fits into Modern Embroidery Practice
Today’s embroidery world blends tradition with technology. Digitized designs like The Earth Made with the Leaves Applique and Embroidery Design represent the best of both: they honor the handcraft ethos of applique and the precision of machine stitching. For small business owners, these designs offer a quick path to unique products that stand out on Etsy, at craft fairs, or in custom orders. For hobbyists, they provide a rewarding weekend project that yields heirloom-quality results.
In educational contexts, teachers use the design to introduce students to map reading, environmental science, and textile arts. The overlapping leaves invite discussion about biodiversity, ecosystems, and the planet’s fragility. Meanwhile, the technical skills gained—managing color changes, using multiple file formats, and setting up a multi-needle machine—are transferable to countless other embroidery projects.
Conclusion
The Earth Made with the Leaves Applique and The Earth Made With The Leaves Embroidery Design are more than just embroidery patterns. They are a creative exploration of our world, rendered through the universal language of leaves. By understanding the design’s structure, respecting its color-change sequence, and setting your machine appropriately, you unlock a rewarding stitching experience that produces a meaningful, beautiful finished piece.
Whether you choose fabric applique for its texture or pure embroidery for its precision, the key takeaway is simple: do not color sort, do not combine colors, and let your machine stop at each change. Follow these guidelines, and the earth—leaf by leaf—will take shape under your needle.