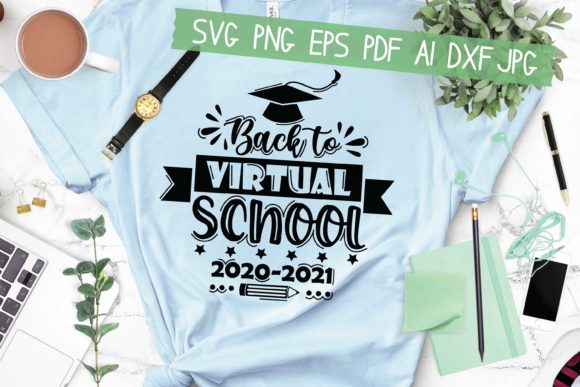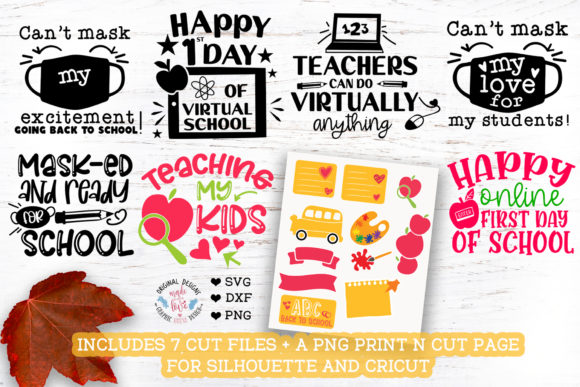
Back to Online School – Bundle: What You Need to Know Before You Cut, Print, and Create
If you have been looking for a versatile set of designs to kick off the school season, the Back to Online School – Bundle might already be on your radar. It promises six cut files and one PNG file, all intended for sticker making using the Print n Cut feature on machines like Silhouette and Cricut. On the surface, that sounds straightforward. But if you have ever opened a file only to find it does not load, cut in the wrong place, or print reversed, you know that small details can make the difference between a smooth project and a frustrating afternoon.
This bundle is aimed at everyone from hobbyists making stickers for their own planners to small business owners producing batches for an Etsy shop. The file formats included cover most major cutting machines, but the assumptions people make about those formats are where problems often start. Let us walk through what this bundle actually contains, the mistakes that trip people up, and how you can avoid them so your first project is a success.
What the Back to Online School – Bundle Actually Includes
The bundle contains six cut files and one PNG file. The cut files are provided in SVG and DXF formats, plus a PNG for print-and-cut or heat transfer projects. The SVG files are designed to work with Cricut machines, Brother ScanNCut, Pazzles Inspiration Pro, Silhouette Cameo Designer Edition, Sizzix Eclips, and similar machines. The DXF files are aimed at Silhouette Cameo users with the Standard Edition. The PNG file is intended for iron-on activities, overlays, clipart, or standalone printables.
That sounds complete, but the catch is that not every file works the same way on every machine, and the instructions around software versions are easy to overlook. The bundle description is clear that if you are unsure about your machine’s software edition, you should consult your manual. Yet many people skip that step and end up with a file that will not open or cuts incorrectly.
Common Mistake #1: Assuming SVG Files Work on Every Silhouette Version
One of the most frequent errors I see is someone with a Silhouette Cameo Standard Edition trying to open an SVG file directly. SVG files are not natively supported in the free Standard Edition of Silhouette Studio. The Designer Edition (paid upgrade) is required to import SVG files. If you own the Standard Edition, your bundle’s DXF file is the one you should use, not the SVG.
This is where the bundle’s warning becomes essential: the SVG files are suitable for Cricut and other machines, and for Silhouette only if you have the Designer Edition. If you are not sure which edition you have, open your Silhouette Studio software and look at the title bar or the About menu. It will say “Silhouette Studio” for the free version or “Silhouette Studio Designer Edition” for the upgrade. Assuming you have the paid version when you do not will stop your project before it begins.
Better approach: Before you download, check your software version. If you have the Standard Edition, use the DXF files. They import cleanly into the workspace and work with Print n Cut just as well. If you have the Designer Edition or a Cricut machine, the SVG files are your best bet because they preserve layers and scaling more reliably.
Common Mistake #2: Using the PNG File for Heat Transfer Without Reversing
The bundle description states clearly that the PNG files are not reversed. That means if you plan to use them for iron-on transfers on t-shirts, tote bags, or other fabric items, the design will appear backwards on the final product unless you flip it before printing. This is a detail that catches even experienced crafters off guard, especially when they are in a hurry to finish a batch of school-themed shirts.
Many people assume that because a PNG file is provided, it is ready to go for any heat transfer project. But heat transfer materials require a mirrored image so that when you press it onto the fabric, it reads correctly. If you skip the mirror step, your “School Rules” sticker will look like “seluR loohcS” on the final shirt.
Better approach: Before sending your PNG to the printer, open it in any basic editing software (or even the printer’s settings dialog) and select the mirror or flip horizontal option. If your printer driver does not offer this, free tools like Paint, Preview on Mac, or Canva can do it in seconds. Make it a habit: every time you use a PNG for heat transfer, check if it needs reversing. This single step saves wasted material and disappointment.
Common Mistake #3: Overlooking Print n Cut Calibration and Placement
The Back to Online School – Bundle is marketed specifically for the Print n Cut feature on Silhouette and Cricut machines. That means you print the design onto sticker paper, then load that printed sheet into the machine to cut around each design. The machine uses registration marks to know where to cut. If those marks are not printed clearly, or if the paper shifts, your stickers will be cut off-center or not at all.
A mistake I see often is people assuming that Print n Cut works perfectly every time without calibration. But every machine drifts slightly over time, and every brand of sticker paper can affect how the printer feeds the sheet. Skipping the calibration step or using the wrong paper settings leads to wasted sheets and frustration.
Better approach: Run a test print on plain paper first. Load that test sheet into your cutting machine and do a test cut. If the cut lines are off, adjust your registration mark settings or recalibrate your machine. For Cricut, use the “Calibrate Print then Cut” option in the settings menu. For Silhouette, use the “Scan and Cut” calibration in the software. Once you confirm the cuts are accurate, then use your sticker paper. This extra ten minutes saves you from ruining expensive printable vinyl.
Common Mistake #4: Ignoring the DXF File’s Limitations on Other Machines
The bundle offers DXF files for Silhouette Cameo Standard Edition users, which is helpful. But some people try to use DXF files on Cricut machines or Brother ScanNCut without checking compatibility. Cricut Design Space, for example, does not natively import DXF files in all cases, and when it does, scaling and layer information can sometimes be lost. Brother machines handle DXF files differently depending on the model and firmware version.
The bundle description specifies which machines each format supports, but it is easy to glance at “DXF” and assume it works everywhere. If you are using a machine not listed for that format, you risk cutting errors or complete file rejection.
Better approach: Stick to the format recommended for your specific machine. If you own a Cricut, use the SVG files. If you own a Silhouette Standard Edition, use the DXF files. If you have a Brother or other machine, test the SVG file first (it is the most universally supported) and only fall back to DXF if needed. A quick test cut on scrap paper will tell you if the file works before you commit to your final material.
Common Mistake #5: Downloading Without Checking the Bundle’s Contents Against Your Project Needs
The Back to Online School – Bundle contains six cut files and one PNG file. The designs are likely themed around school subjects, stationery, or motivational phrases. But not every file may suit your specific need. If you plan to make stickers for a teacher’s gift, you might only use two of the six designs. If you want to make iron-on shirts for the whole family, you need the PNG file to be reversed and sized correctly.
A mistake I see is people buying a bundle, opening all the files, and then realizing that the designs are too small, too large, or not in the right format for their intended use. The bundle description does not usually specify exact dimensions, so you need to open the files in your software and check the size before cutting.
Better approach: Before you buy, think about what you actually need. If you only need one specific design for a project, a bundle might still be worth it if you can use the rest later. But if you need a very large design or a specific phrase that is not included, you might be better off creating your own or buying a single design. Once you download, open each file and check the dimensions. Resize as needed in your cutting software, but keep proportions locked so the design does not distort.
What to Check Before You Use the Bundle
Here is a practical checklist to run through before you even unzip the files:
- Your software version: Confirm whether your Silhouette Studio is Standard or Designer Edition. If you are unsure, open the software and look. This determines whether you use SVG or DXF.
- Your machine’s supported file types: Cricut users should stick to SVG. Brother users test SVG first. Silhouette Standard users use DXF.
- The PNG’s orientation: If you plan to use it for heat transfer, flip it horizontally before printing. If you are using it for stickers or overlays, no flip is needed.
- Print n Cut calibration: Run a test print and cut on plain paper before using your good sticker paper. Adjust if necessary.
- Design size: Open each file and check its dimensions in your software. Resize to fit your project while keeping proportions locked.
- Material settings: Use the correct settings in your cutting software for sticker paper, printable vinyl, or heat transfer material. Do not assume the default settings work.
How to Get the Best Results with the Back to Online School – Bundle
Once you have checked all the above, the actual process is straightforward. Pick the file format that matches your machine and software. Import it into your cutting program. If you are making stickers using Print n Cut, set up your project as a Print then Cut project. Print the design onto your sticker paper using the highest quality print settings your printer supports. Load the printed sheet into your cutting machine, making sure the registration marks are visible and the paper is straight. Run the cut. Peel and enjoy.
If you are using the PNG for iron-on, reverse it first, print onto heat transfer paper, trim if needed, and press according to the material instructions. If you are using the designs as clipart or overlays in a digital project, the PNG works as is.
One detail that many beginners overlook is the importance of good lighting when your machine scans registration marks. If your work area is dim, the sensor may not read the marks correctly. Make sure your sticker sheet is placed under a bright light. Also, avoid glossy sticker paper if your printer and machine struggle with reflections. Matte sticker paper is more forgiving.
Final Thoughts
The Back to Online School – Bundle is a useful collection for anyone making back-to-school stickers, gifts, or apparel. The variety of file formats covers most popular cutting machines, and the inclusion of a PNG file adds flexibility for heat transfer and digital use. But like any tool, it works best when you understand its limitations. Checking your software version, using the correct file format, reversing the PNG for iron-on, and calibrating your Print n Cut system are small steps that prevent big problems.
By taking a few minutes to verify these details before you start, you save yourself wasted material, time, and frustration. Whether you are a hobbyist making a few stickers for your kids or a small business owner fulfilling orders, getting the setup right the first time means more time creating and less time troubleshooting. The bundle gives you the designs. Your preparation gives you the results.